

Table of Contents
How To Film Professional-Looking Videos On A Budget
Filming eyecatching videos doesn’t require expensive cameras or a Hollywood crew. Plenty of creators make sharp, professionallooking content right from their bedrooms or garages. With some planning, creative tricks, and a smart approach to budget gear, your videos can stand out. You won’t need to empty your wallet.
I’ve spent years tweaking setups, learning on the fly, and squeezing the most out of affordable gear. Here’s how you can create videos you’re really proud of, even if you’re starting with just a smartphone and a shoestring budget.
Step 1: Get Clear on Your Video Goals
Before you start thinking about cameras or microphones, it helps to know what you want your video to do. Content aimed for YouTube classics, product promos, or social media clips will each need a slightly different approach. Thinking about your goals up front helps you avoid gear overkill, focusing your limited resources where they’ll count the most.
Questions to Nail Down Your Project:
- What’s the main message or story you’re telling?
- Where will viewers watch your video — phone, computer, or TV?
- Will you need to film indoors, outdoors, or both?
- Do you want talking head shots, screen recordings, or action shots?
Jotting down your core idea, the shots you want, and where you plan to film gives you a foundation for all the choices that come next. It’s amazing how much better things go when you start with a plan, even if it’s just scribbled notes on a notepad.
Step 2: Use Your Smartphone (or EntryLevel Camera) Wisely
You don’t need a highend DSLR to shoot sharp video. Modern smartphones pack plenty of power, and entrylevel cameras often have solid video quality these days. The real trick is learning to get the most out of whatever camera you already have.
Tips for Maximizing Your Camera:
- Clean your lens: Even a quick wipe can give a boost to clarity.
- Shoot in the highest resolution available: 1080p or 4K usually looks best.
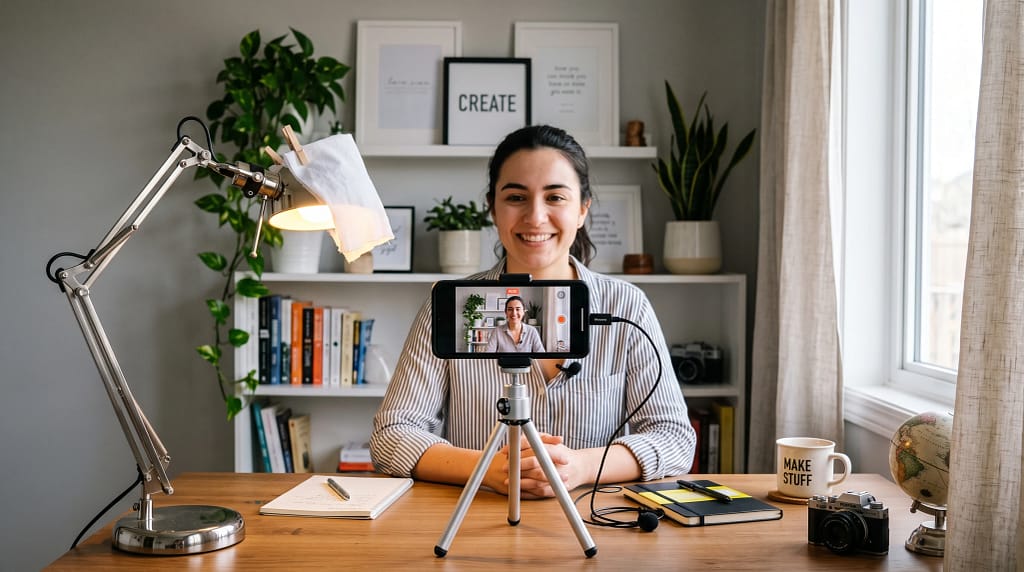
- Keep it steady: Use a tripod or prop your phone up on books or boxes.
- Lock exposure and focus: On most phones, tap and hold on your subject until focus and brightness stick.
Pro Tip:
If you use your phone, switch to the rear camera for better quality. Even though it might be tempting to use the selfie camera for convenience, the rear camera nearly always gives better results.
Step 3: Master Lighting Without Breaking the Bank
Great lighting can make a cheap camera look expensive. Bad lighting does the opposite, so don’t skip this step. You don’t need softboxes or fancy kits. You just need to get creative. Good lighting smooths out skin, reduces noise, and makes your video way more watchable.
Budget Lighting Options:
- Natural window light: Position yourself so the window faces you (not behind you). Midday light is softer; avoid harsh sunlight.
- DIY reflectors: Use a white poster board or tin foil to bounce light where you need it.
- Cheap LED ring lights or clamp lights: These are affordable and useful for illuminating your face or workspace.
- Room lamps: Try replacing bulbs with daylight (5000K) bulbs for a neutral look. Adjust placement to fill in shadows.
Lighting Setup Example:
Place a window in front of you, a reflector or lamp to the side to fill shadows, and check your shot for even lighting on your face. Watch how the shadows change as you reposition your sources.
Step 4: Improve Audio on a Budget
Bad audio is one of the quickest ways to lose viewers. The good news is, you can get clear sound even with minimal gear, and it makes a huge difference in how professional your video feels.
Ways to Record Better Audio:
- Wired earbuds with a mic: Clip the mic near your collar and hide the cord under a shirt for a tidy look.
- Budget lavalier mics: These start cheap online and can plug right into your phone or camera.
- Voice recording app: Record audio with your phone close to you, then sync with your video during editing.
Practical Audio Tips:
- Film in a small, carpeted room to cut down on echoes.
- Turn off fans, AC, and anything noisy nearby.
- Do a 5second test record before every session, and listen back to make sure the sound is clear.
Even if your video isn’t perfect, crisp, clear audio can keep people watching. If they can hear you well, they’re much more likely to stick around and see what you have to say.
Step 5: Plan and Style Your Shots
You don’t need fancypants gear to design eyecatching shots. Just a little planning and attention to detail go a long way, making your video feel nextlevel cool without the cost.
Shooting Techniques on a Budget:
- Use the rule of thirds: Keep your eyes about onethird down from the top of the frame for a balanced look.
- Declutter your background: A clean, tidy area looks more professional and less distracting.
- Add pops of color: A plant, a lamp, or art can make your background feel more styled and lively.
- Change up camera angles: Film some shots from the side or above for some extra style and variety.
Example Setup:
Set up your camera or phone at eye level, make sure your background is neat and slightly interesting, and check everything in the frame before you hit record. Sometimes, a quick adjustment or moving one thing out of the shot can make a huge difference.
Step 6: Get Smart With Editing Apps
Editing can polish a budget video and help cover up little mistakes. There are plenty of free and lowcost apps that work on your phone or computer. Don’t be afraid to try a few before settling on your favorites.
BudgetFriendly Editing Software:
- DaVinci Resolve: Free, prolevel, works on most computers.
- iMovie or Windows Clipchamp: Great for quick edits and easy to pick up.
- CapCut or InShot: Really handy for editing right on your phone. Perfect for social media content.
Quick Editing Tips:
- Trim out dead air and mistakes for a snappy video.
- Add simple transitions to keep things smooth.
- Pump up your audio if it sounds too quiet.
- Add music (from a royaltyfree source) to bring in energy and set the mood.
Step 7: Optimize for Different Platforms
Videos have different requirements depending on where you plan to share them. Shooting and editing with the final platform in mind helps your video shine in the right format, making it easier to reach your audience.
Key Things to Consider:
- For YouTube: Shoot horizontal (landscape), keep videos longer, and use chapters for easy navigation.
- For TikTok/Instagram: Shoot vertical, get to the point fast, and add captions so people can follow along without sound.
- Keep file sizes small enough for quick uploading and sharing. Compress if needed.
Knowing where your video will end up is all it takes to tweak your approach and make your content stand out across different social platforms.
Stick With It and Grow Your Video Skills
Getting confident with video takes practice. Your first few videos might feel awkward or rough, but every project teaches you more. I started with shaky camera work and echoey audio, but I learned new tricks with every attempt. There’s no need to buy new gear each time. Watching free YouTube tutorials and following other creators helped me a lot.
Affordable Ways to Keep Improving:
- Watch other creators and take notes on what you like in their videos.
- Experiment with free trials before spending money on gear or software.
- Ask for honest feedback from friends or online groups. Take their advice seriously.
- Tweak as you go, and don’t be afraid to film the same thing more than once if you’re not happy with the results.
As you keep filming and trying out new tricks, you’ll see your skills getting better, and your videos will naturally level up.
Common Questions & Troubleshooting for Budget Video Making
How can I avoid shaky footage with no tripod?
- Use a stack of books, the back of a chair, or even tape your phone to a stable object. Whatever you can find that won’t move works well in a pinch.
What if my room has poor lighting?
Try shooting in the brightest room, add extra lamps, or film outdoors during golden hour (the hour after sunrise or before sunset). Don’t hesitate to experiment with moving your setup until you stumble upon the best lighting spot.
How do I make my audio less echoey?
- Film in a smaller room with soft surfaces; blankets and pillows help to absorb sound.
- Hang up extra towels just outside the shot if echo is an issue. Rugs and even laundry on the floor can help deaden noise.
Can you really make pro videos with just a phone?
Absolutely. Plenty of channels and social media stars started off with just phones. Focus on lighting, sound, and solid storytelling — the camera is just the tool. People are interested in what you have to say and how you say it.
Your Action Plan for Filming On a Budget
- Write down your video idea and the shots you want to get.
- Pick your best camera or phone, and clean the lens for clarity.
- Set up near a window or use whatever lights are available to brighten up your scene.
- Hit record; check your framing and sound by reviewing clips as you go. Don’t hesitate to adjust on the fly.
- Edit with a free app, polish your video, and upload with confidence.
You don’t need fancy gear to make eyecatching videos. A smart plan, a little creativity, and steady practice will take you a long way. It’s impressive how much you can pull off just by making small tweaks and thinking outside the box. Give it a shot and see how professional your videos start to look, even on a tight budget.
Keep Exploring V-Rank
Creating a great video is only part of the journey. Getting it discovered, watched, and ranked is the next challenge.
V-Rank brings together practical guides, tools, and resources for improving video visibility—from video creation and SEO to platform algorithms, audience engagement, and ranking strategies.
New to video ranking?
Start with the Starter guides and build the fundamentals step by step.
Already know the basics?
Explore Advanced strategies for improving visibility, engagement, and performance.
Looking for deeper insights?
Visit the Expert section for more detailed ranking strategies and analysis.
Or browse the Latest Blogs to see what’s new on V-Rank.
Keep Learning. Keep Testing. Keep Ranking.
Video platforms change. Algorithms evolve. Tools come and go.
The goal of V-Rank is to help you understand what matters, test what works, and make better decisions about getting your videos discovered.
Wishing you the best of luck in achieving the top position!
First steps as a vlogger?
Visit Vlogsuite with tips and tools for vloggers
May you soar to rank #1 and celebrate your success with joy and excitement! 🚀 🏆🎉
Good luck ✨
Learn how to monetize your own website and sign up for free
This is an affiliate link to a tested platform that’s great for beginners who want to learn web development.
Keep visiting and spread the word! Thank you!
Related Posts

What You Need To Know About Emerging Video Platforms

Google Video Rankings & What You Need To Know

Top 10 Free Tools For Video Creators

Advanced Strategies For Video SEO

How To Optimize Your YouTube Videos For Search

Understand Facebook Video Ranking Algorithms

Create A Strong Brand Identity Within Your Niche Market

Boost Your Ranking With Seo Ai Tools

How To Use Metadata To Improve Video Rankings